Blog Photography Tricks for Beginners

Today I will reveal some professional tips on photography for bloggers: the blog photography tricks for beginners. Because we should all start somewhere right?
What is Photography for Bloggers or Blog Photography?
As a photographer and blogger, I have found how so little there is online about how to photograph especially for blogging. There are rules, tricks and tips that can help you elevate your blogging game in a second – but no one really talks about it!
Feeling the same?
Let’s do this! I am very excited to talk you through the best photography tricks for beginners. But before getting into details, I have already written two posts that will help you define what is blog photography and why photography will improve your blog.
Go go go read them and then come back here. After the below image, we will start discovering how to improve your blog layout and design thanks to your original photography!

Top 3 Blog Photography Tricks for Beginners
Whether you are a long time blogger, a new one or a photography lover, these tricks are my top 3 life-changing photography tips which will help you improve your blog design and appearances in a second.
Grab a pen and note down these tricks because once you learned them, they will become automatic but for now, I suggest you to write them.
So, willing to start? I am!
1.Alternate Your Crops
When you are in shooting mode, think ahead of time and plan what crops you want. By crops, I mean what kind of image you need for your post.
For examples, in flat-lays and products photography (beauty, lifestyle or what so ever) think of having at least two macro groups of photos: all-together (with all the props/products) and close-ups (details of 1 or more products).
This helps a lot in giving the post a dynamic flow so that images are slightly different one after the other when reading the whole article.


If you are a fashion or travel blogger where you need to be in the pictures, try to alternate between full-body, profile and details pictures. If you want to go even further think about rotating the camera or getting creative and cropping a lot (for example, imagine a face cropped just above one eye and below the lips – it would be amazing for make-up details).
For more surprising ideas on how to shoot I have written a FREE Blog Photography guide ready for you to access! It’s more than 20 pages and it gives you a lot of insights on the world of blogging and photography.
Worth a read, no? I will link it here below.

So, it’s now time to move to the next photography trick!
2.Name your photos correctly
Naming the photos correctly will help you with the SEO of your blog as well with some social media just like Pinterest.

And who wants to save time when pinning images? MEEE!
So this is how I do it:
- Make sure of naming the images before uploading to my site
- I take care of putting only useful words connected to the name of the blog post (no connection words like my, for, the)
- I use – not the underscore _
- In the end, I will have blog-photography-tricks-beginners-3.jpg because the title is Blog Photography Tricks for Beginners
3.Upload Light Images
It’s now time to talk about how much images weight and why your blog is slow when opening. There is a connection and usually, images we upload are super heavy (more than 1000kb)!
So can you imagine when you have 10 images per blog post? Your website is slow for this reason!
But you can easily improve it!
I have two methods, one is for people that use Photoshop, Lightroom or any other editing program (unfortunately Canva doesn’t allow you to choose image weight). The second method is for everyone!
Reduce Image Size with Photoshop or Lightroom
When you have to export a batch of images, always remember to also choose the size. Jpeg works fine or PNG if want a transparent background.
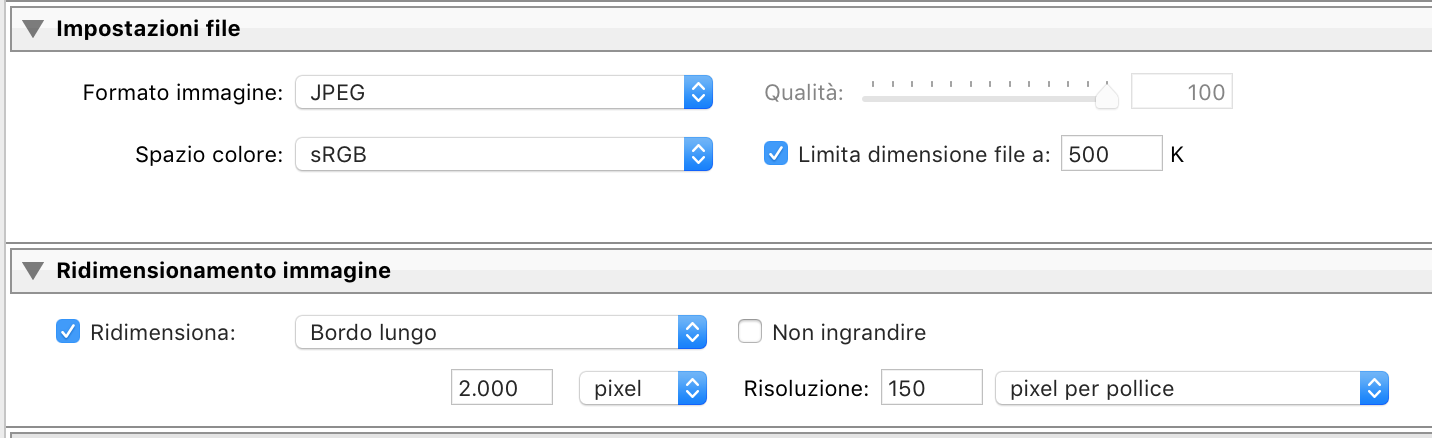
With Adobe Photoshop, go to Save for Web and choose the size you want.
In Lightroom, go to Export and easily decide the size (see image below).
Or Reduce Image Size Online for Free
If you don’t have Photoshop, Lightroom and Canva isn’t helping, go to this website which reduces the size of jpeg and PNG as well. It works wonders. I use it every day at work and it will help you have a faster website! Look for tinypng.com, it’s my recommendation.
If you know other sites, please let me know, I am very curious to have alternatives!
These are my tops 3 photography tips for beginners but if you want to have more information on how to improve your photography for your blog, my guide is here to help you.
It’s free and you can have it now! Just click on the link below!
Soon I will come up with more posts dedicated to blogging, photography and self-care because at this time we all need to help other, even in a small way.
Let me know if you have found these tricks useful and tell me what are you struggling with photography the most?

Remember to Pin this post for later!